

The Elm programming language is a great way to model and write a modern web application. By utilizing functional programming and a strong type system, Elm encourages developers to build applications that are more reliable and more easily maintained. But as a compile-to-Javascript language, there is only so much that Elm can offer by default. Any tasks that require large computations in Javascript will, unfortunately, require the same computations in Elm. Such large tasks can block the main thread in browsers, causing visual issues and a non-responsive UI. Obviously this is not what we want for our users, so what can we do?
Enter Web Workers. From MDN:
Web Workers makes it possible to run a script operation in a background thread separate from the main execution thread of a web application. The advantage of this is that laborious processing can be performed in a separate thread, allowing the main (usually the UI) thread to run without being blocked/slowed down.
Web Workers are a way that browser-based applications can move certain tasks out of the main thread, into their own environment. Web Workers have a number of restrictions to them, such as not being able to access the DOM, but they do have the ability to make HTTP requests via fetch as well as run standard Javascript code. Since Elm is a compile-to-JS language, that means that we can mount an Elm app within the Web Worker as well!
Let’s explore what it would look like to use Elm inside of a Web Worker. We’ll look at two ways to do it:
- Using vanilla JS, no bundlers or frameworks beyond what Elm provides.
- Incorporating these techniques into Vite, which provides a helpful wrapper around the Web Worker API.
Writing our Elm Modules
To start, let’s set up a basic setup to work with. In a new folder, run elm init, which generates our base elm.json and a src folder. Within src, create two files: Main.elm and Worker.elm. We’ll fill these in shortly. Let’s also create an index.html at the root of our working direction (we’ll come back to it later).
First, let’s set up a very basic Main.elm file. While Web Workers are primarily useful for large tasks, for this example we’re going to keep things simple for our examples. In our main file, we’ll implement a basic counter example:
port module Main exposing (main)

import Browser
import Html exposing (Html, button, div, text)
import Html.Events exposing (onClick)


init : (Int, Cmd msg)
init =
    ( 0, Cmd.none )


type Msg
    = Increment
    | Decrement
    | Set Int


update : Msg -> Int -> ( Int, Cmd Msg )
update msg model =
    case msg of
        Increment ->
            ( model, increment model )

        Decrement ->
            ( model, decrement model )

        Set value ->
            ( value, Cmd.none )


view : Int -> Html Msg
view model =
    div []
        [ button [ onClick Decrement ] [ text "-" ]
        , div [] [ text (String.fromInt model) ]
        , button [ onClick Increment ] [ text "+" ]
        ]


subscriptions : Int -> Sub Msg
subscriptions _ =
    receiveCount Set


main : Program () Int Msg
main =
    Browser.element { init = \_ -> init, update = update, view = view, subscriptions = subscriptions }


port increment : Int -> Cmd msg


port decrement : Int -> Cmd msg


port receiveCount : (Int -> msg) -> Sub msg
This is a fairly straightforward Elm app, but with one key difference: rather than update the state here, we are returning a command to relay the current state to a port. We also have a port to receive a number, which then updates our local state.
Since we are going to handle this very complex computation in a Web Worker, let’s now write a basic Elm module to run from within the Worker.
port module Worker exposing (main)

import Platform


type Msg
    = Increment Int
    | Decrement Int


init : () -> ( (), Cmd msg )
init _ =
    ( (), Cmd.none )


update : Msg -> () -> ( (), Cmd msg )
update msg _ =
    case msg of
        Increment int ->
            ( (), sendCount (int + 1) )

        Decrement int ->
            ( (), sendCount (int - 1) )


subscriptions : () -> Sub Msg
subscriptions _ =
    Sub.batch
        [ increment Increment
        , decrement Decrement
        ]


main : Program () () Msg
main =
    Platform.worker { init = init, update = update, subscriptions = subscriptions }


port increment : (Int -> msg) -> Sub msg


port decrement : (Int -> msg) -> Sub msg


port sendCount : Int -> Cmd msg
What’s going on here? First, we import Platform, which provides us with the function Platform.worker. Most of the time, when writing an Elm app, we’re leaning on elm/Browser to create apps that bind to the DOM. But in this case, we don’t have a DOM to bind to, so we utilize Platform to create a basic app that doesn’t do that. worker takes three inputs: init, update, and subscriptions (it’s basically the same as Browser.element, from our Main.elm example).
We also create two ports for incrementing and decrementing the input (an incredibly taxing computation for even modern Javascript), and connect those to equivalent Msg values. Within the update function, we then send the results to sendCount, which outputs from Elm into the wild west of Javascript for us.
Conceptually, it looks like this:
- Main receives a message (
Increment) - In Main’s update function, we send the current count to a matching port (
increment 0) - This value is sent (via Javascript) from Main to Worker, and connected to the matching port (also
increment 0) - The Worker sends out the result of its intense calculation (
sendCount 1) - Main receives the updated value, and updates its model accordingly (
receiveCount 1)
If you’re familiar with The Elm Architecture, this is basically the same thing but with more steps. It’s also important to note that because we are relying on ports to communicate between the Main and Worker apps, this calculation is inherently asynchronous. This is really only ideal for certain workloads, and should probably not be used 100% of the time (especially for small tasks like addition/subtraction).
Scaffold index.html
Now that we’ve had a look at the Elm code, let’s look at Javascript. Since we are using vanilla JS and not a bundler, we first need to bundle our Elm code. Run the following command:
elm make src/Main.elm --output main.js
elm make src/Worker.elm --output elm-worker.js
This will output our main.js and worker.js files, which we can import into our HTML. Speaking of which let’s do that! Here’s a basic HTML file to start with. All it does is mount our Main app, we’ll get to the Worker in a moment.
<!DOCTYPE html>
<html lang="en">
  <head>
    <title>Elm Web Workers</title>
  </head>
  <body>
    <div id="app">
      <div></div>
    </div>
    <script src="main.js"></script>
    <script>
      const app = Elm.Main.init({
        node: document.getElementById('app')
      });
    </script>
  </body>
</html>
If you open the HTML file in a browser right now, it should properly render the Main app, but the buttons don’t appear to do anything. That’s because rather than updating our model, they are instead sending it to ports. Currently, we aren’t doing anything with our ports, but before we hook them up, let’s add our Web Worker.
Adding the Web Worker
For this section, I will be referring to MDN’s excellent guide to using Web Workers.
In order to create a web worker, we need to have an external JS file that can be imported and executed as a web worker. The most basic implementation of a worker can be a simple console.log. Let’s do that first.
Create a worker.js file and put in console.log("Hello, worker!"). Then, in our HTML file, add this code to the top of your script block:
const worker = new Worker('worker.js')

const app = Elm.Main.init({
    node: document.getElementById('app')
});
This instructs the browser to create a worker using the Javascript file that is found at the named location (in our case, worker.js). If you open your devtools, you should see “Hello, worker!” appear there, generated from worker.js:1. Great!
Now let’s add some communication between the worker and main JS files.
Sending a message
In your HTML file, let’s add another line of code that will enable sending a message to the worker. To send a message from main to the worker, we use worker.postMessage().
const worker = new Worker('worker.js')

const app = Elm.Main.init({
    node: document.getElementById('app')
});

worker.postMessage(1)
To receive a message in the worker, we set onmessage (not a variable) to be a function that receives a function. Delete the contents of your worker.js file and add the following:
onmessage = function ({ data }) {
  console.log(data);
}
As with all Javascript events, there are a number of other values sent to the onmessage function. For the sake of this blog post, we only care about the data key. If you run this script, you should see a 1 logged out into the console. Congratulations, we are now able to pass data to the worker! But what about passing it into Elm?
Web Workers provide a special API for importing scripts into them:
Worker threads have access to a global function, importScripts(), which lets them import scripts. It accepts zero or more URIs as parameters to resources to import.
By using importScripts(), we can import our Elm worker module, initialize it, and begin to use its ports. Let’s update our worker.js as follows:
importScripts("elm-worker.js")

const app = Elm.Worker.init();

onmessage = function ({ data }) {
  app.ports.increment.send(data);
};

app.ports.sendCount.subscribe(function(int) {
  console.log(int);
})
For those less familiar with Elm, we are initializing our Elm worker without a DOM node (because there are no DOM nodes in the worker). Then, using its ports, when we receive a message from the main thread, we send it to the increment port. Elm then does its incredibly complicated calculations, and returns (via the sendCount port) the updated integer (which we log for now). Excellent!
Before we go too much further, let’s update the main and worker to properly target either the increment or decrement ports. In index.html, update your script block to the following:
const worker = new Worker('worker.js');
const app = Elm.Main.init({
    node: document.getElementById('app')
});

app.ports.increment.subscribe(int => worker.postMessage({
    type: 'increment',
    value: int
}))

app.ports.decrement.subscribe(int => worker.postMessage({
    type: 'decrement',
    value: int
}))
Then, in our worker, update to the following:
importScripts("elm-worker.js");

const app = Elm.Worker.init();

onmessage = function ({ data }) {
  const { type, value } = data;

  if (type === "increment") {
    app.ports.increment.send(value);
  }

  if (type === "decrement") {
    app.ports.decrement.send(value);
  }
};

app.ports.sendCount.subscribe(function (int) {
  console.log(int);
});
If you refresh the page, you can now start clicking the buttons and seeing the results log in the console. Of course, it’s only going to show 1 or -1, so let’s pass data back to the main thread.
Web Workers have a global postMessage function that allows us to pass back data. Let’s wrap up this code and send the calculated result to the main thread (and our Main Elm app):
In worker.js, do the following:
importScripts("elm-worker.js");

const app = Elm.Worker.init();

onmessage = function ({ data }) {
  const { type, value } = data;

  if (type === "increment") {
    app.ports.increment.send(value);
  }

  if (type === "decrement") {
    app.ports.decrement.send(value);
  }
};

app.ports.sendCount.subscribe(function (int) {
  console.log(int);
  postMessage(int);
});
In index.html, update the script block:
const worker = new Worker('worker.js');
const app = Elm.Main.init({
    node: document.getElementById('app')
});

app.ports.increment.subscribe(int => worker.postMessage({
    type: 'increment',
    value: int
}))

app.ports.decrement.subscribe(int => worker.postMessage({
    type: 'decrement',
    value: int
}))

worker.onmessage = function( { data }) {
    app.ports.receiveCount.send(data);
}
And with that, we are now passing data! Congratulations! If you need to pass any complex data between the main and worker threads, you will probably need to turn to JSON encoding/decoding. You can also pass an object with a custom message if needed, rather than using multiple ports and relying on Javascript to act as the controller.
Here’s a repository with the code we’ve been looking at.
Web Workers in Vite
Using vanilla HTML and JS is nice, but most of the time at work or in larger projects we’re using some sort of build tooling to have a more streamlined experience. I’m personally a big fan of Vite, the frontend tooling solution by the creator of Vue. I maintain a Vite template for building Elm applications, which utilized the excellent Elm plugin for Vite to achieve hot module reload and directly importing our .elm files into our Javascript.
As an added benefit for our use case, Vite provides some abstraction over the Web Worker API that we explored above. In Vite, when we import a script that we want to use as a web worker, we can append a query parameter that signals to Vite what it is, and then Vite will wrap it in a function that generates the correct worker command.
Let’s migrate our above code into Vite and see how this works. I’ll be using my template to scaffold a basic app. To do that yourself, run the following command:
npx degit lindsaykwardell/vite-elm-template vite-elm-web-worker
cd vite-elm-web-worker
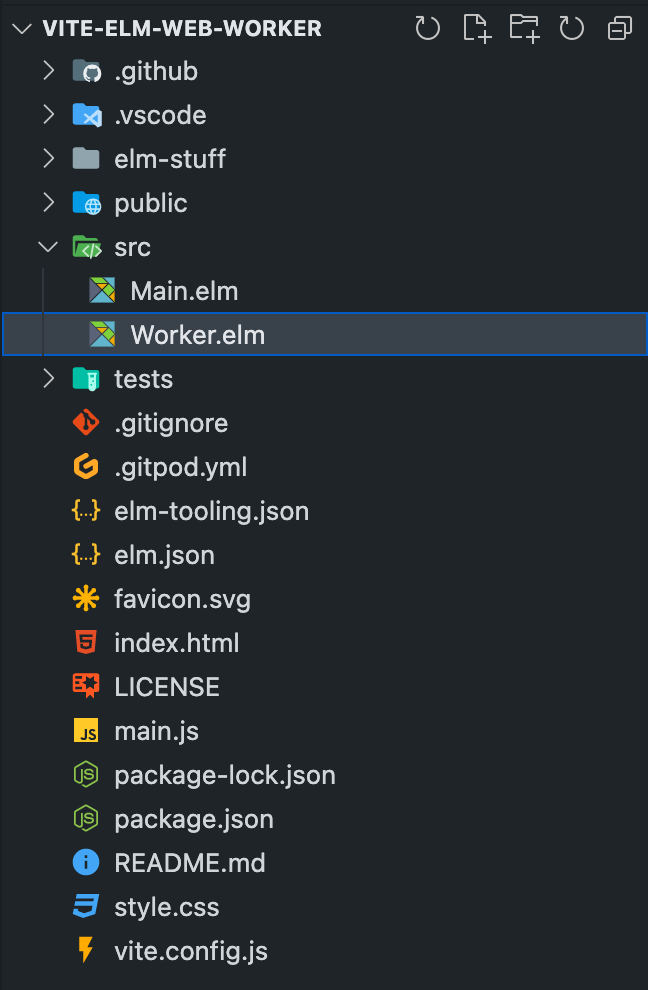
npm installThat will clone the template locally (with no Git history) into the vite-elm-web-worker folder, enter it, and install the required dependencies. Feel free to rename it to whatever you prefer. Then, delete the contents of the src folder and replace them with our Main.elm and Worker.elm files. At this point, you should have a setup that looks like this:
Next, let’s bring over our worker.js and other Javascript. Let’s start by creating a worker.js file (we’ll come back to it in a moment), and then update our main.js file to include our worker and port logic:
import "./style.css";
import { Elm } from "./src/Main.elm";
import ElmWorker from "./worker?worker";

const root = document.querySelector("#app div");

const worker = new ElmWorker();
const app = Elm.Main.init({ node: root });

app.ports.increment.subscribe((int) =>
  worker.postMessage({
    type: "increment",
    value: int,
  })
);

app.ports.decrement.subscribe((int) =>
  worker.postMessage({
    type: "decrement",
    value: int,
  })
);

worker.onmessage = function ({ data }) {
  app.ports.receiveCount.send(data);
};
This should look very familiar to what we were doing, but with some additional import syntax at the top. This is because we’re using Vite, and Vite supports ES Modules by default during development. Rather than including multiple script tags (which is still an option), we can import a single ES module (main.js), and import our other files within it.
For the worker, most of the code we wrote previously will work, but Vite provides some additional sugar on top of the API here:
The worker script can also use import statements instead of importScripts() - note during dev this relies on browser native support and currently only works in Chrome, but for the production build it is compiled away.
So rather than using importScripts(), Vite requires that we use the standard ES Module import syntax. However, there’s an issue here: Elm doesn’t compile by default into a format that works well with ES Modules. In addition, the Vite plugin for Elm assumes that you are building a browser-based app (a reasonable assumption), and injects some DOM-powered troubleshooting helpers, which do not work in the worker because the worker doesn’t have access to the DOM.
For example, let’s assume we update our worker to use ES import syntax, like this:
import { Elm } from './src/Worker.elm'

const app = Elm.Worker.init();

onmessage = function ({ data }) {
  const { type, value } = data;

  if (type === "increment") {
    app.ports.increment.send(value);
  }

  if (type === "decrement") {
    app.ports.decrement.send(value);
  }
};

app.ports.sendCount.subscribe(function (int) {
  console.log(int);
  postMessage(int);
});
If you start your development environment now (using npm run dev), you will immediately see an error in the browser console:
Uncaught ReferenceError: HTMLElement is not definedThis error is being thrown by overlay.ts. This file adds an error overlay when Elm isn’t able to properly compile. So if you’re working in the Main.elm file, and make a change that doesn’t compile, you’ll see something like this:
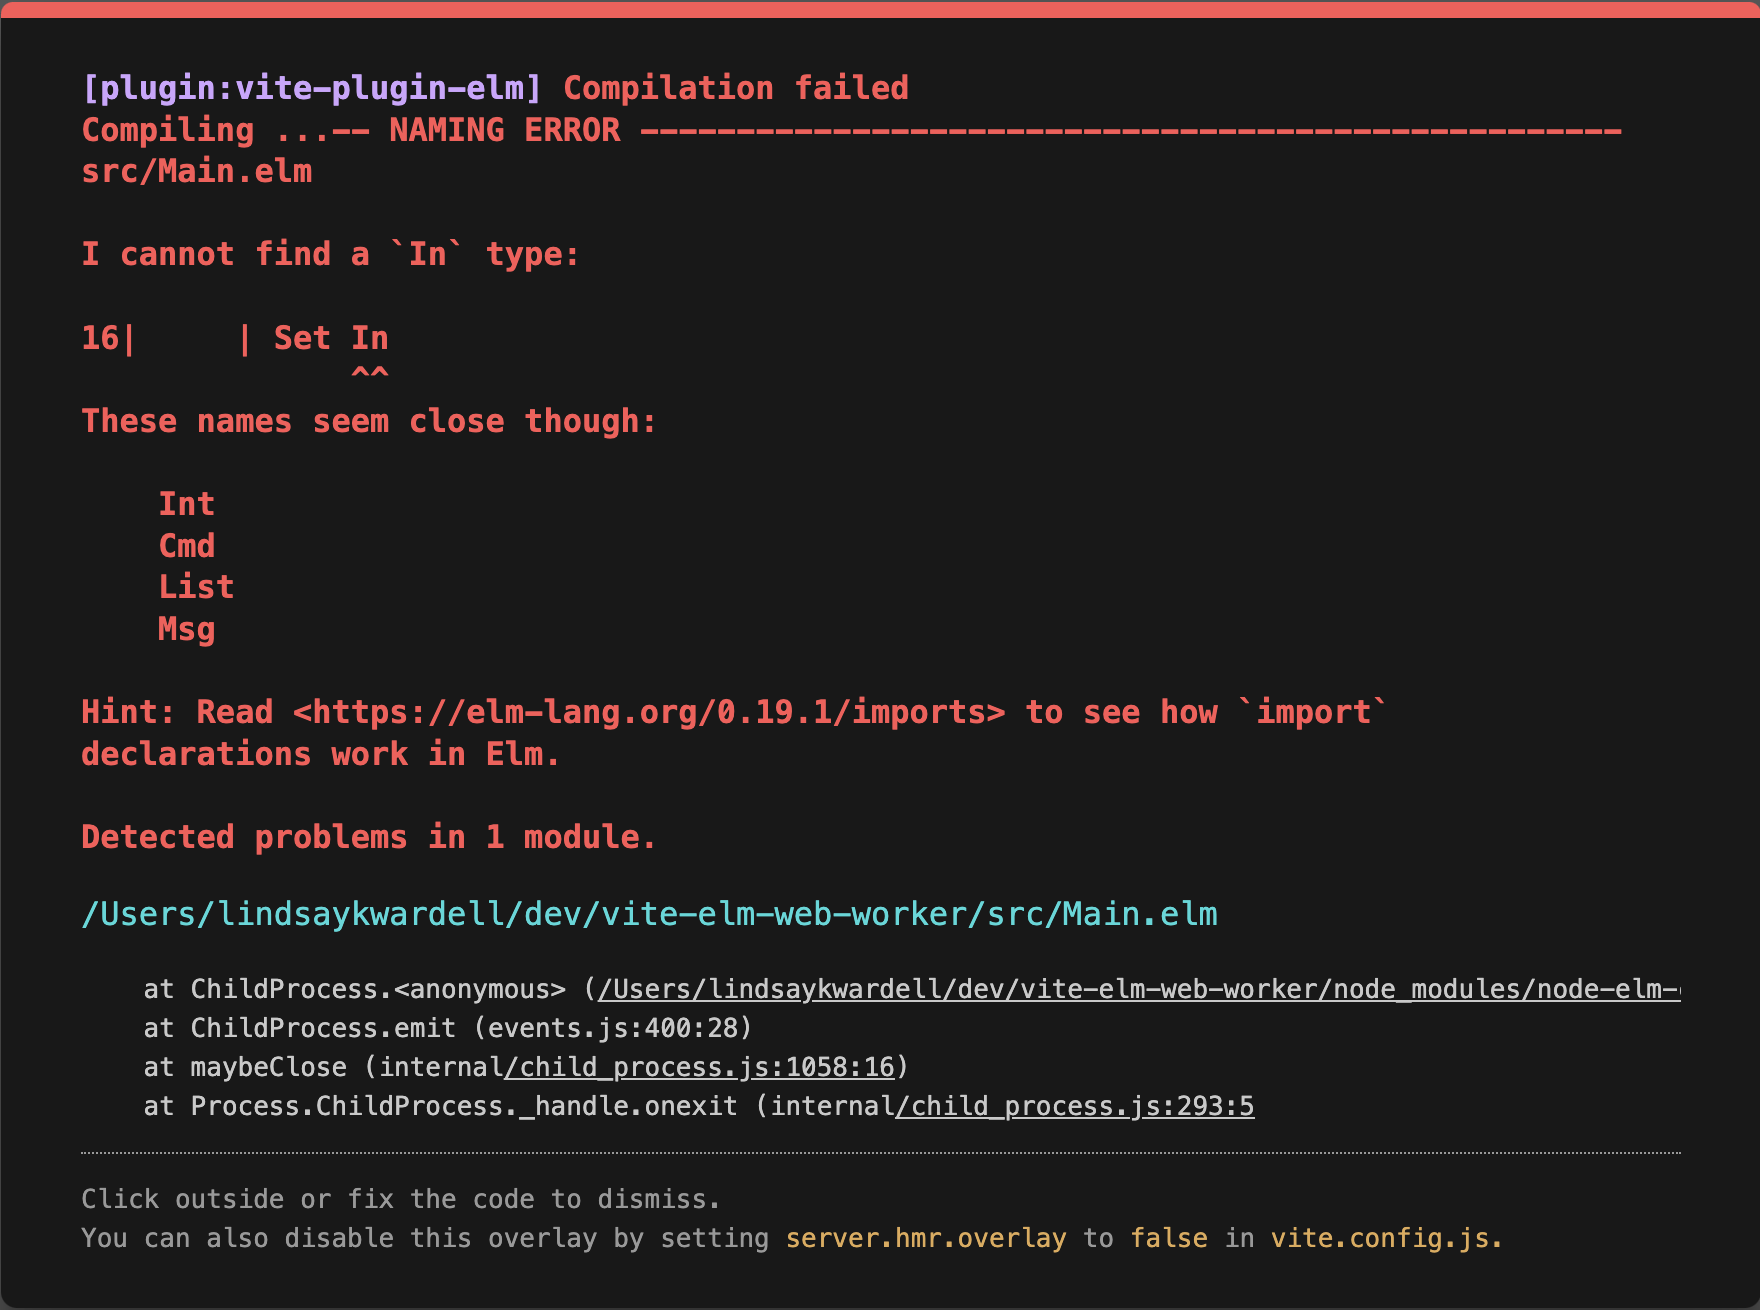
Pretty helpful during app development, but very frustrating when trying to load Elm in a web worker. There is a setting that can be set in the Vite config (server.hmr.overlay: false) to disable the overlay, but unfortuantely it doesn’t actually prevent HTMLElement from being referenced within the Worker.
A second approach could be to precompile our Worker.elm file, and import it directly into the worker.js file (as we did in our vanilla JS example). This, however, throws a silent error; the app will load without any obvious failures, but the worker isn’t actually initialized. Go ahead and try it! Run elm make src/Worker.elm --output elm-worker.js, then update the worker.js to the following:
import { Elm } from './elm-worker.js'

console.log("I'm here!")

const app = Elm.Worker.init();

onmessage = function ({ data }) {
  const { type, value } = data;

  if (type === "increment") {
    app.ports.increment.send(value);
  }

  if (type === "decrement") {
    app.ports.decrement.send(value);
  }
};

app.ports.sendCount.subscribe(function (int) {
  console.log(int);
  postMessage(int);
});
If you spin up the app again, you’ll notice that our console.log doesn’t even run. That’s because the web worker was never initialized, which is very unhelpful for our complex computations.
So what’s the solution? At the moment, the best solution I’ve found is to create a separate entrypoint for Vite, import Worker.elm there, and compile it with Vite. That will perform the transformation we need on Elm to allow an import into the worker.
Within our src folder, create an elm-worker.js file, and put the following into it:
import { Elm } from "./Worker.elm";

const app = Elm.Worker.init();

export default app;
This is a very basic file, all it does is import our Worker.elm file, initialize the app, and export it. Now we need to compile this file with Vite. At the root level of our app, create a file called worker.config.js. This will be a special Vite configuration file that we will only use to compile elm-worker.js. Here’s a good configuration to start with:
import { defineConfig } from "vite";
import elmPlugin from "vite-plugin-elm";
const path = require("path");

export default defineConfig({
  publicDir: false,
  plugins: [elmPlugin()],
  build: {
    outDir: "./elm-worker",
    sourcemap: false,
    lib: {
      entry: path.resolve(__dirname, "./src/elm-worker.js"),
      name: "elm-worker",
      fileName: (format) => `elm-worker.${format}.js`,
    },
  },
});
This configuration specifies that we only care about elm-worker.js, not importing any other files (such as the public folder), and to build those files in an elm-worker folder. By default, Vite compiles both ESM and UMD formats; this is probably not useful for our case, but it’s not a big issue.
With our config in place, run the following command:
npx vite build --config worker.config.jsThis instructs Vite to run its build command, using our new config file instead of the default one. Once it finishes, you should see a new elm-worker folder, with two files inside: elm-worker.es.js and elm-worker.umd.js.
With our newly compiled ES-compatible file in hand, we can now, at last, import our Elm worker into our web worker file, and everything will work as expected. Update our worker.js file (at the root of our app) to the following:
import app from './elm-worker/elm-worker.es.js'

onmessage = function ({ data }) {
  const { type, value } = data;

  if (type === "increment") {
    app.ports.increment.send(value);
  }

  if (type === "decrement") {
    app.ports.decrement.send(value);
  }
};

app.ports.sendCount.subscribe(function (int) {
  console.log(int);
  postMessage(int);
});
If you run npm run dev now, and start clicking on the plus and minus buttons, you should see the value displayed on the screen changing. Congratulations! We now have a web worker running Elm within Vite!
This is by no means not a straightforward solution, but it does at least work, and it allows us to utilize the other benefits of using a frontend development tool like Vite. To make things easier going forward, you can add a custom script to package.json (something like build:worker) to run our worker build command, and you can even add it to our dev script to ensure it runs every time, keeping our web worker closer in sync with the rest of our app.
Here’s a repo with our working Vite code.
Conclusion
Obviously basic addition and subtraction isn’t worth the extra overhead of using web workers. Tasks that require large computations (either complex calculations, or just parsing a lot of data) are ideal for this situation. One side project where I’ve used a web worker required potentially processing more than 2 megabytes of data, which, when done in the main thread, caused the entire app to freeze. Moving the same calculation to a web worker didn’t speed up the calculation, but it did allow the UI (and the CSS) to continue running at full speed. Here’s the web worker from the side project if you’re interested!
Also, in case you’re concerned, Web Workers have been supported in all modern browsers since IE10, so feel free to use them in your new projects!
I look forward to seeing what you make with Web Components!